Update: 30 January 2019
Computer vision has recently been greatly integrated into robotics and automation. From camera manufacturing to quadcopter SLAM and navigation, image classification and object detection have been widely applied to achieve more accurate localization and faster computation. However, due to environmental disturbances such as wind gust, rain, and lack of lights, image quality can reduce to a different extent. This problem is especially severe on Webcam vision which is broadly used in robotics. While working with Manav’s AEAM a.k.a Advanced Eyes Articulate Mechanism Vision for months now, I realized that previous tiny cheap AIO Cameras are not very robust against low lightning, perform poorly against sudden movements and easily gets prone to distortion over a period of time due to internal heating. That’s why, I decided to better Pi camera module(OV5647) which is designed for the Pi, and performance far more better. This module is an excellent add-on for Raspberry Pi, to take pictures and record quality videos, with the possibility to apply a considerable range of configurations and effects.
Modifications
1. Replacing Camera Module for AEAM
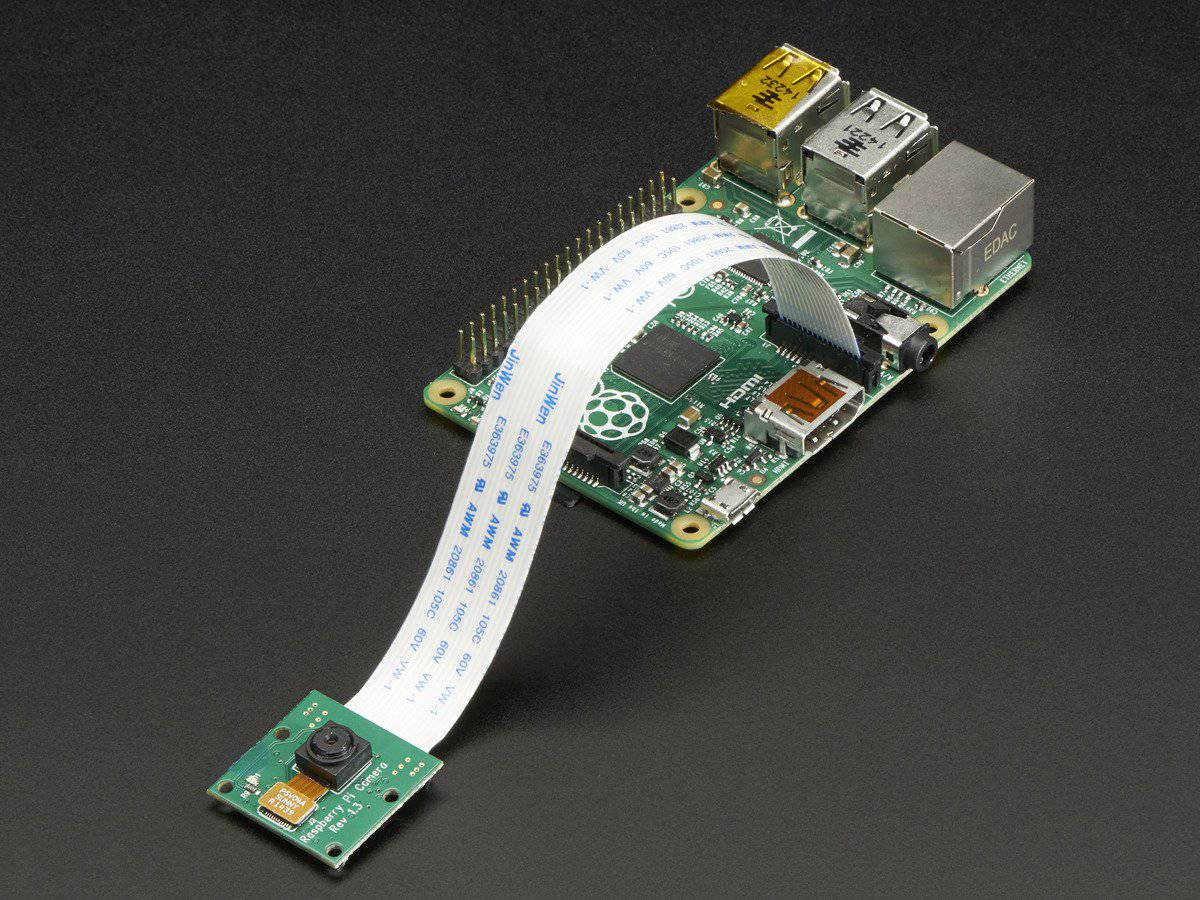 Raspberry Pi Camera Module
The Raspberry Pi camera module is a great accessory for the Pi. It’s great quality, and can capture still photos and record video in full HD (1080p). The original 5-megapixel camera module was released in 2013, and a new 8-megapixel version was released in April this year. Both versions are compatible with all Raspberry Pi models. There are also two variations—a regular visible light camera, and an infra-red camera—both available for 2500-3000 INR.
OmniVision OV5647 Camera Module:
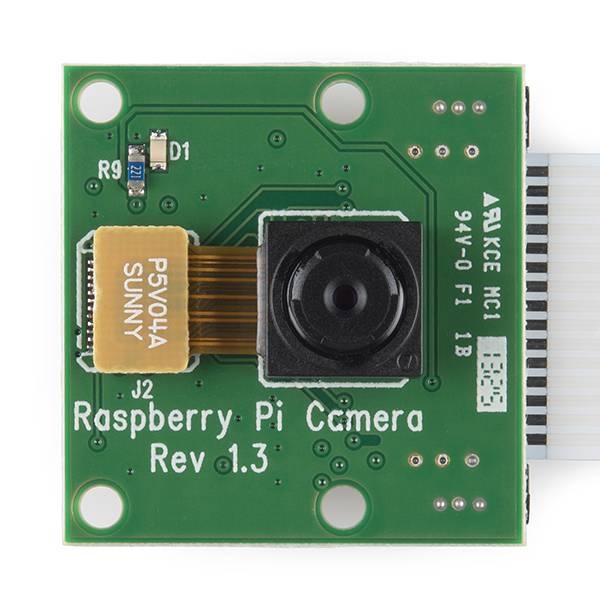 OmniVision OV5647 Camera Module
The camera module is high spec and much better quality than a basic USB webcam. Its feature-packed firmware fully utilizes the power of the VideoCore GPU in the Raspberry Pi SoC, allowing recording 1080p video at 30fps, 720p at 60fps, and VGA resolution (640x480) at 90fps—perfect for slow-motion playback.
Below you can see a full breakdown of the resolutions and attributes that this camera supports at various sensor modes:
| Mode | Resolution | Aspect Ratio | Framerate | FoV | Binning |
|---|---|---|---|---|---|
| 1 | 1920x1080 | 16:9 | 1 - 30 | Partial | None |
| 2 | 2592x1944 | 4:3 | 1 - 15 | Full | None |
| 3 | 2592x1944 | 4:3 | 1/6 - 1 | Full | None |
| 4 | 1296x972 | 4:3 | 1 - 42 | Full | 2x2 |
| 5 | 1296x730 | 16:9 | 1 - 49 | Full | 2x2 |
| 6 | 640x480 | 4:3 | 42 - 60 | Full | 4x4 |
| 7 | 640x480 | 4:3 | 60 - 90 | Full | 4x4 |
Note: It is important to note that the above list is not the only possible resolutions available when taking pictures on the Raspberry Pi - they are a set of resolutions the sensor can directly output to the Pi’s GPU. The VideoCore IV GPU ISP (Image Sensor Pipeline) itself is then able to resize to the desired resolution.
Infrared Support: The OV5647 Camera module can also serve as an infrared camera (Pi NoIR), made to produce a special camera without the infrared filter. The API works exactly the same, and in visible light, pictures will appear mostly normal, but they can also see infrared light, allowing capturing and recording at night. Thereby suitable for adding night vision functionality to our AEAM Vision.
2. Re-Modeling AEAM Frame 3D design and printing
Here’s how I redesigned AEAM eyeballs which moves using servo motors so that it can be adapted to my OV5647 Pi Camera. I designed it all in Blender - a free 3D modeling and animation software that I use a lot nowadays.
Re-Designing and Re-Modeling: So, before even drawing the eyeballs I needed to know how big a hole to leave in front of it for the camera to look through. To do that, I used a clamp to hold a ruler in front of the Pi camera and measured the distance between them(i.e. 75 millimeters). Then, I used a short Python program to capture the image which I ran from a command line and the resulting image that I saw from a distance of 75 millimeters the camera:
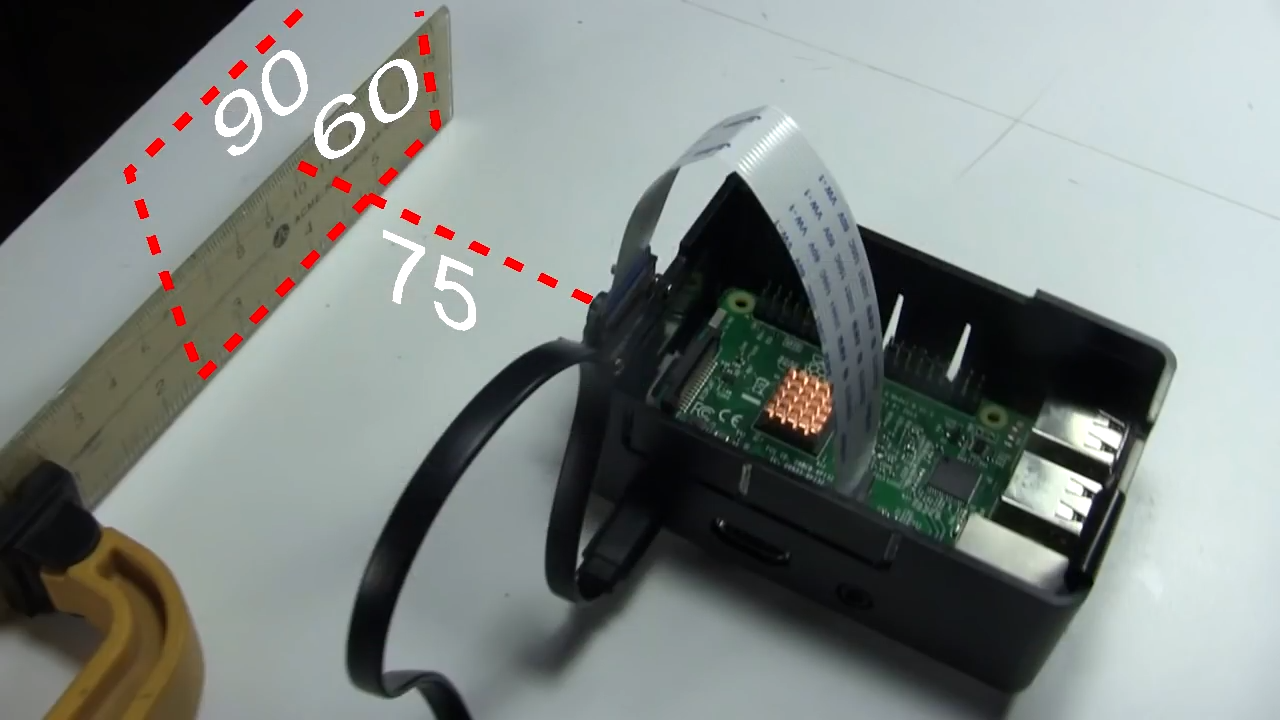 Distance between scale and Camera Module(i.e. 75 millimeters)
From the above image, we can see 45 millimeters in either direction or 90 millimeters altogether, also, this image is 720 pixels wide by 480 high(1.e. 720x480 px). Therefore on calculating, I concluded that it has a 1.5 aspect ratio. Thereby, dividing the 90-millimeter width by 1.5, we found out that the final Field of View(FoV) at 75 millimeters is 60 millimeters high and so in Blender Software I create a similar view screen of previously calculated dimensions and made sure the eyeballs hole was big enough to not block the view. Also, our Manav Humanoid had a few design requirements such as our new design should fit inside its head without blocking or colliding with other parts while moving. Therefore, I designed it while checking it with a outer 3D model of Manav head at the same time.
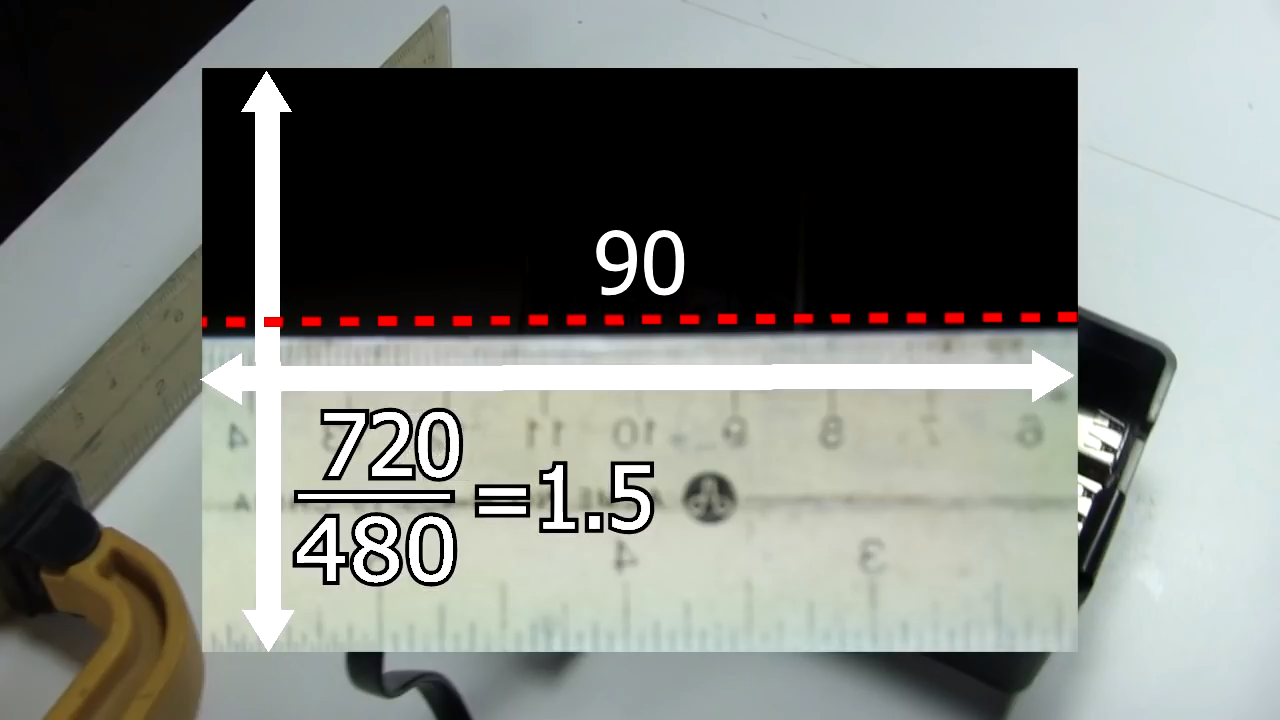 Calculated 1.5 aspect ratio at distance 75-mm from the setup
I also wanted it all up near the front of the head, thus leaving plenty of room in the head for other things. The Pi camera attaches to the eyeball simply by snapping it into place on to pivot points so that changing cameras are simply a matter of designing a new eyeball and most importantly I wanted to make sure the driver servo motors didn’t interfere with each other.
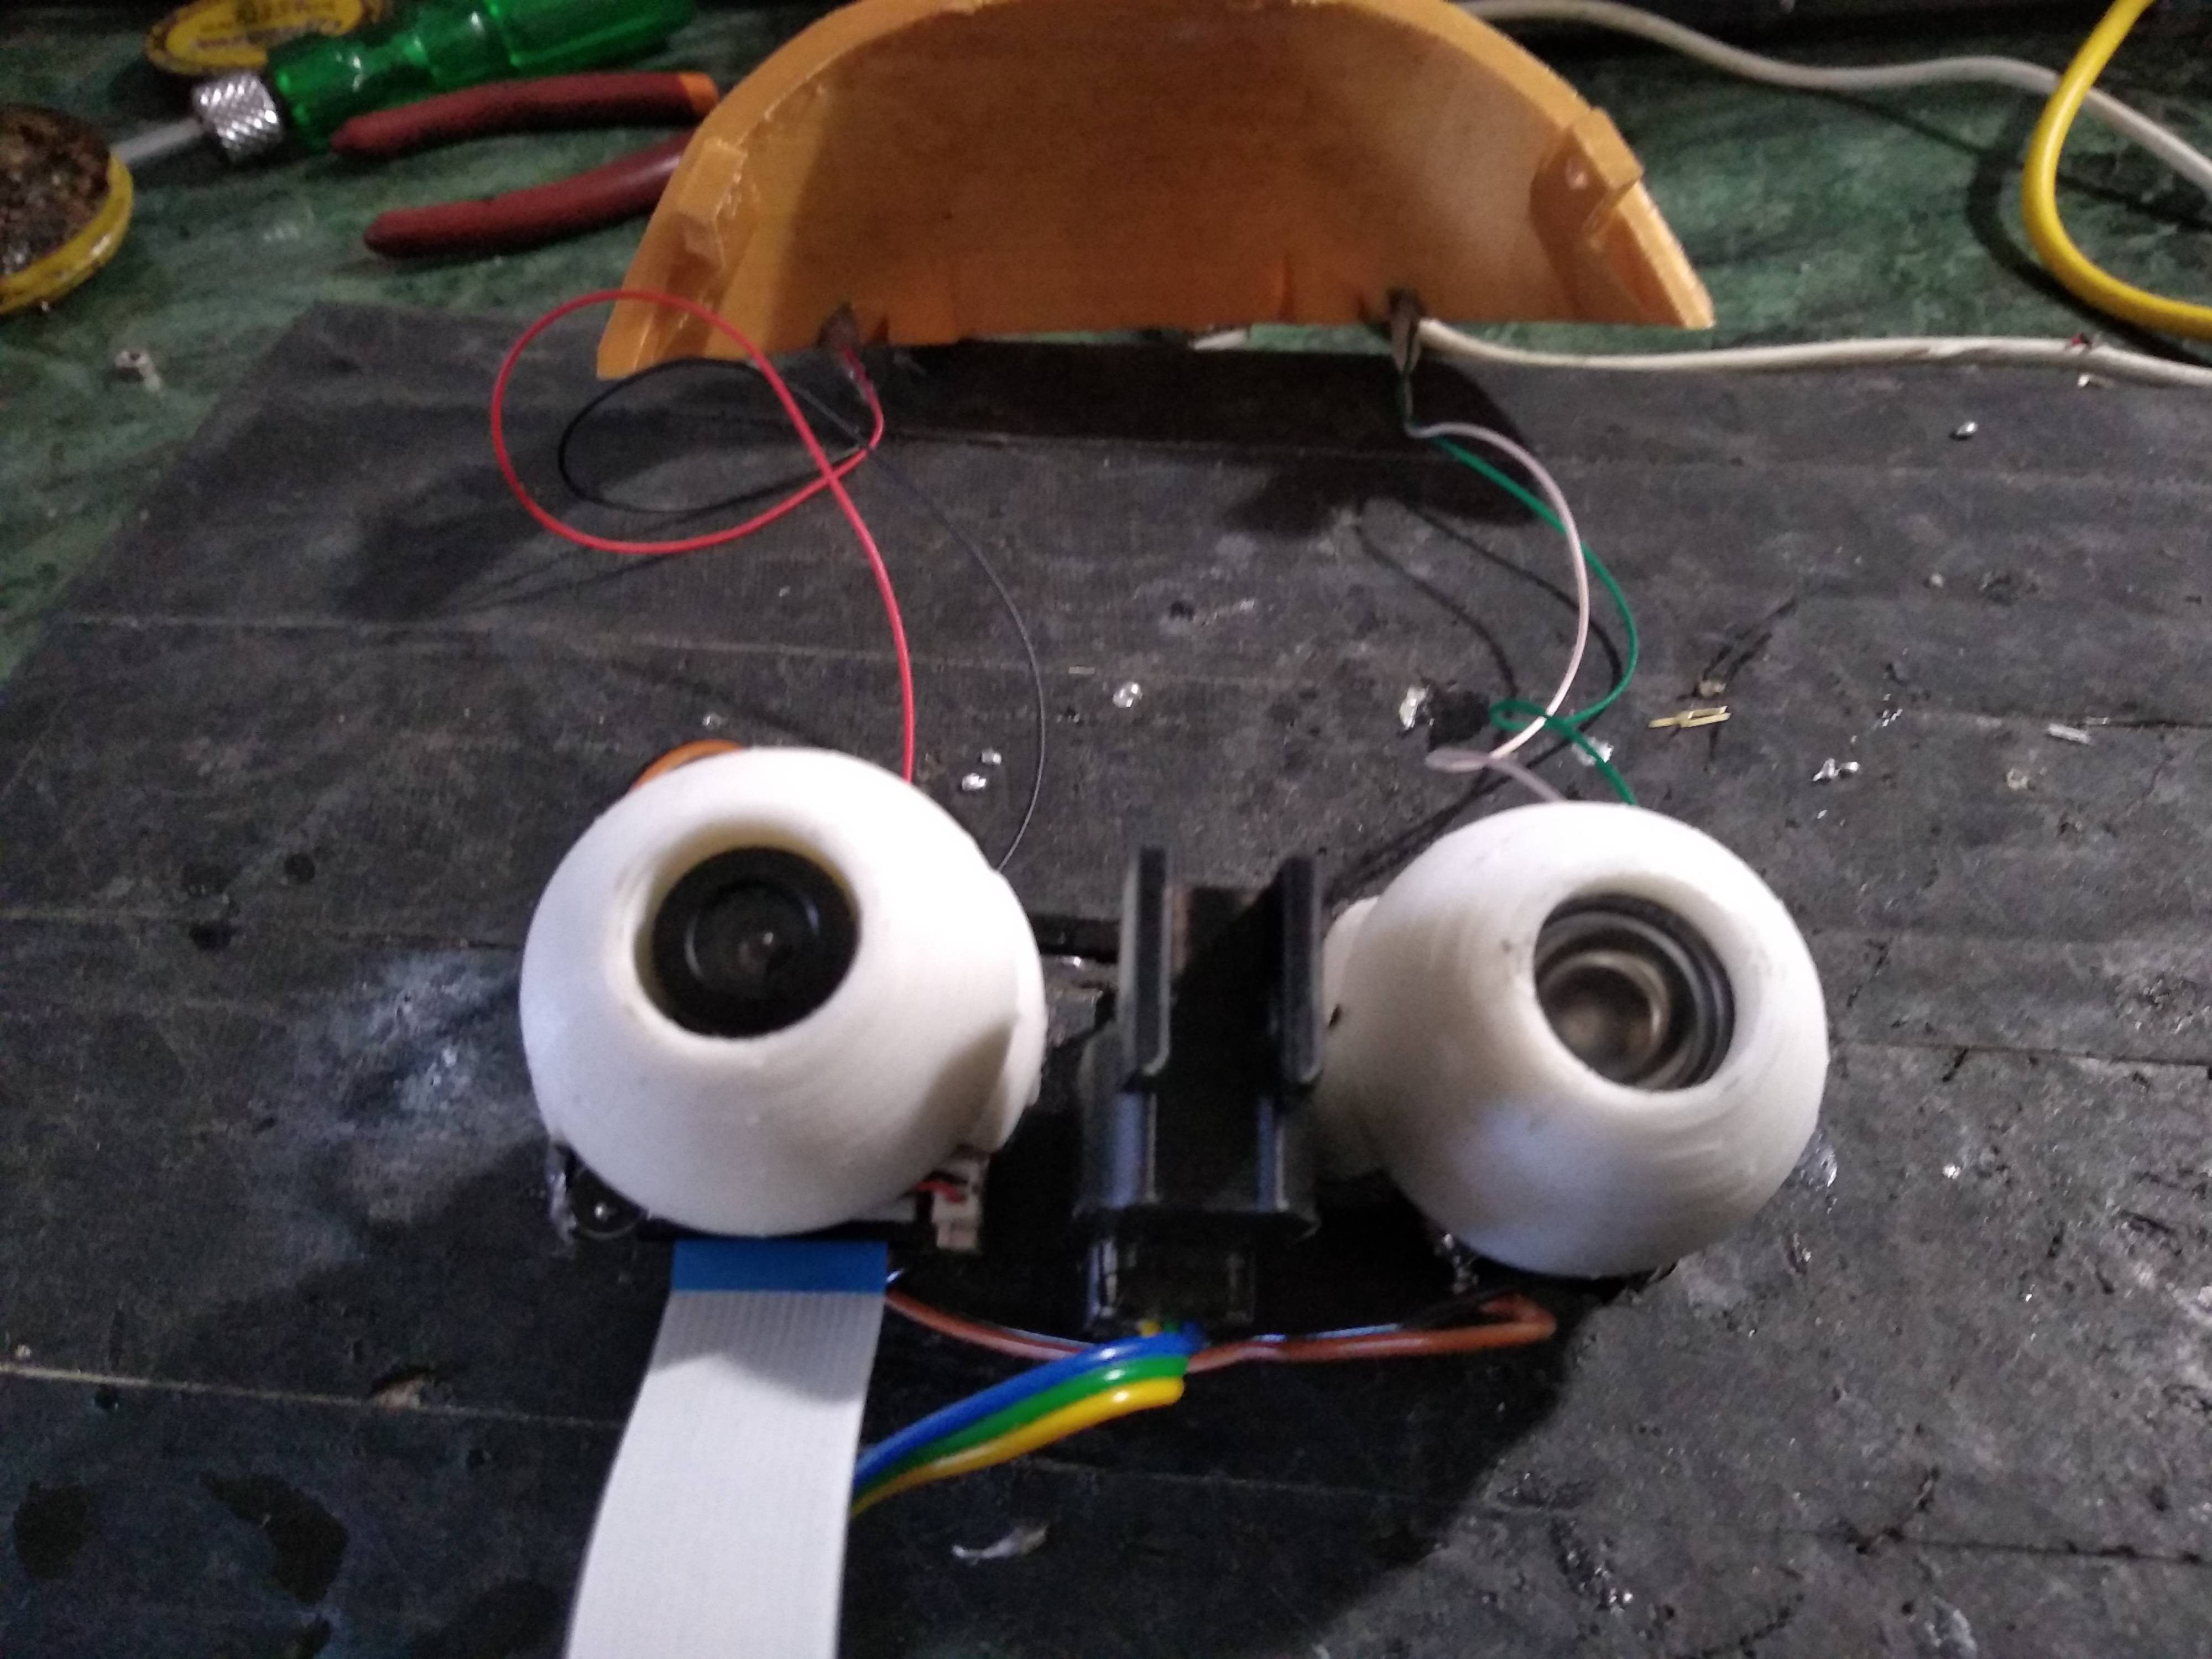
Major changes: In previous AEAM Design, I was using 4 servos to control the vertical and horizontal motion(i.e. roll and pitch) of the camera/eyeballs. But after several tests, I discovered due to design constraints occurred due to the bigger size of OV5647 Camera Module as compared to eye cut-out of Manav’s head, It was impossible to make the vertical motion with the new camera. Therefore I decided to leave vertical motion of eyes to the servo with control the up-down motion of head instead. Only the horizontal motion of the eyeball/camera is kept in the new design controlled by a single powerful servo to aid synchronization between them. It is designed such the given servo rest at the center of AEAM frame and its rotation move a shaft that translates motion in both the eyeballs. Also, due to limited space left inside the head, I decided not to include eyelids in this new design.
 AEAM Modified (Back View)
3D Printing and Assembly:
I 3D printed everything on AEAM using my CR-10 3D printer with PLA Filament. I printed the eyeball using a raft to hold it down to the printing bed better and thereby I printed the main eye structure. The first time I tried assembling it all I had a lot of fine-tuning to do. The first step in assembling is to try to attach the Pi Camera to the eyeball there are two holes on the board on either side of the lens which I can use for them. So, I built some studs into the back of the eyeball they’re designed to compress to fit through the holes and then expand once through the holes and hold the camera in place one of them goes through fairly easily but the other got stuck at something. I tried compressing the stud with the blunt tip of a knife and even tried a little sanding in the studs to gap, so that I can compress it closed more but then I realized I’d forgotten to design in a notch in the back of the eyeball to account for some parts on the circuit board that stick out there in the way. So, I mark where I need to do some trimming and do some careful cutting with a knife the camera now easily snaps into place. Also, I update the 3D model. There were two holes one on either side of the eyeball. The main eye structure has two matching pivot points sticking out for those holes and the eyeball simply snaps into place and it pivots connecting rod between two eyeballs easily both ways horizontally. What I did next, is a little cleanup for the holes for the two 50-mm screws and thereby those screws fitted just fine but I find some more design flaws while drilling the hole for the screws for attaching the structure. The problem was that the servo motor horn was too small and the same issue exists with the hole for attaching the arm to the connecting rod, So I change those in the final 3D model.
 AEAM Modified (Front View)
Testing I wrote up some simple test code which moves the eyeball around and here it is in actions(Ball Tracking Algorithm):
It’s running code that I wrote which emulates some of the neurons in the back of the human eye and in the brain in order to fixate on changes in its field of view
Conclusion:
As we can see in the final testing video, the motion of eyeball is quite slow, which is caused due to Pi-Arduino Serial latency and friction between the 3D printed parts. So in the upcoming posts, I’ll try to minimize or eliminate these problems. Also, I’ll discuss night vision capabilities in AEAM Vision with a live example. So stay tuned for more.
Hey there, Hope you enjoy reading this article. If so, Share it with your family & friends! So Stay Tuned and Stay Creative ;)